I think you could say that my husband is addicted to pesto. Of course, I never cease to remind him that when we first started dating he wouldn't even try it. Green stuff on pasta? Gross! But then one night I finally convinced him to try a little bite. Then he tried another... and now it's all I can do to keep him from eating it by the spoonful before dinner.
In the spring I buy one of those small pots of organic basil that the grocery store expects people to use in their kitchens. The greatest thing about these pots of kitchen herbs, is that they're filled with a dozen or more seedlings. So, rather than spend $1.99 (minimum) per tiny basil plant at a nursery, I spend $1.99 for anywhere from 12 to 20 healthy, organic seedlings. I plant them outside, and by July I have my own little basil forest. The price savings is really inconsequential when you factor in the expense of the pine nuts, cheese, and olive oil, but I can't see the point in spending $20 on plants when you could just spend $2.
There are many pesto variations, of course, but there are two that stick out most in my mind. The best pesto I ever remember having was in a restaurant on the way to Vermont one summer. I wish that I knew the name of the restaurant, but unfortunately, I don't even know the name of the town. It was from them that I learned to keep some of the pine nuts whole. The second best pesto was an electric green batch that I made when we were living in our first apartment together. That year, I grew the basil on the fire escape. I have no idea what caused the color of the pesto to be so lime green, but it was the best batch I ever made, and I haven't been able to replicate it since.
I never make it the same way twice, and a lot depends on small adjustments for taste, but I've finally written down my recipe for pesto (I had to remind myself to measure). I make multiple huge batches of pesto every summer and freeze it for winter consumption. We eat pesto on pasta, in risotto, on paninis, on salad, and in cold pasta salads. It's pretty versatile, and it's always an easy go-to meal. This recipe will make about 4 cups of pesto; I normally double it.
J'adore: Pesto
Ingredients:
6 medium cloves of garlic
8 oz. pine nuts
3 cups basil leaves
1 cup parsley leaves
2 cups grated cheese (I use a parmesan/romano blend)
1/2 to 1 cup olive oil
sea salt
Directions:
Peel each of the garlic cloves and mince in a food processor. Scrape down the sides and pulse again. Add 7 to 7.5 ounces of the pine nuts and blend until the garlic and nuts make a think, chunky paste. Rinse and spin/dry the basil leaves and parsley. Add three cups of packed basil leaves, one cup of packed parsley, 2 cups of grated cheese, and at least 1/2 a cup of oil to the food processor. Blend until all of the leaves are finely chopped. Add oil to thin to desired consistency. Add a pinch or two of sea salt, if desired. Stir in the remaining whole pine nuts.
Serve with pasta or any way you like!
Notes:
*It's best to harvest the basil early in the morning before the sun gets too hot. Making pesto on a rainy day is another safe bet. The flavor and color tend to be better this way.
*The parsley helps to keep the basil and pesto from turning brown.
*Freezes well, just sit out or in the refrigerator to thaw.
*If storing in the fridge, it will last better with a bit of extra olive oil.
*If you are microwaving, microwave the pasta first, then mix in the pesto. Although pesto tastes great on already heated foods, it does not taste-- or look-- so great when it is heated directly in a microwave or pot.
*It would be easier to just throw everything in the food processor and press the on button, but then you end up with big chunks of garlic unevenly spread throughout the pesto. In my experience, it's most important to blend the garlic first, then the nuts, and then everything else. This is also the reason that I use so much garlic right from the start. You can always tone it down by adding more pine nuts, cheese, basil, or parsley, according to your taste preferences, but it's hard to add more garlic after the fact.
Monday, August 23, 2010
Monday, August 16, 2010
Spanish Rice
This Spanish rice turned out GREAT! Much better than I expected. We ate it with enchiladas, and it made them taste even better.
J'adore: Easy Spanish Rice
Ingredients:
1 onion, diced
olive oil
1/2 cup brown rice
1 can vegetable broth
1/3 jar (approx. 4 oz.) salsa (I used Trader Joe's Double Roasted Salsa)
Directions:
Saute the diced onion in olive oil in a sauce pot. When onions are cooked, add 1/2 cup rinsed brown rice. Saute for another minute or two. Add vegetable broth, bring to a boil, reduce to a simmer, cover, and simmer until liquid is absorbed and rice is tender. When rice is cooked, stir in the salsa.
Wednesday, August 4, 2010
Jammin'
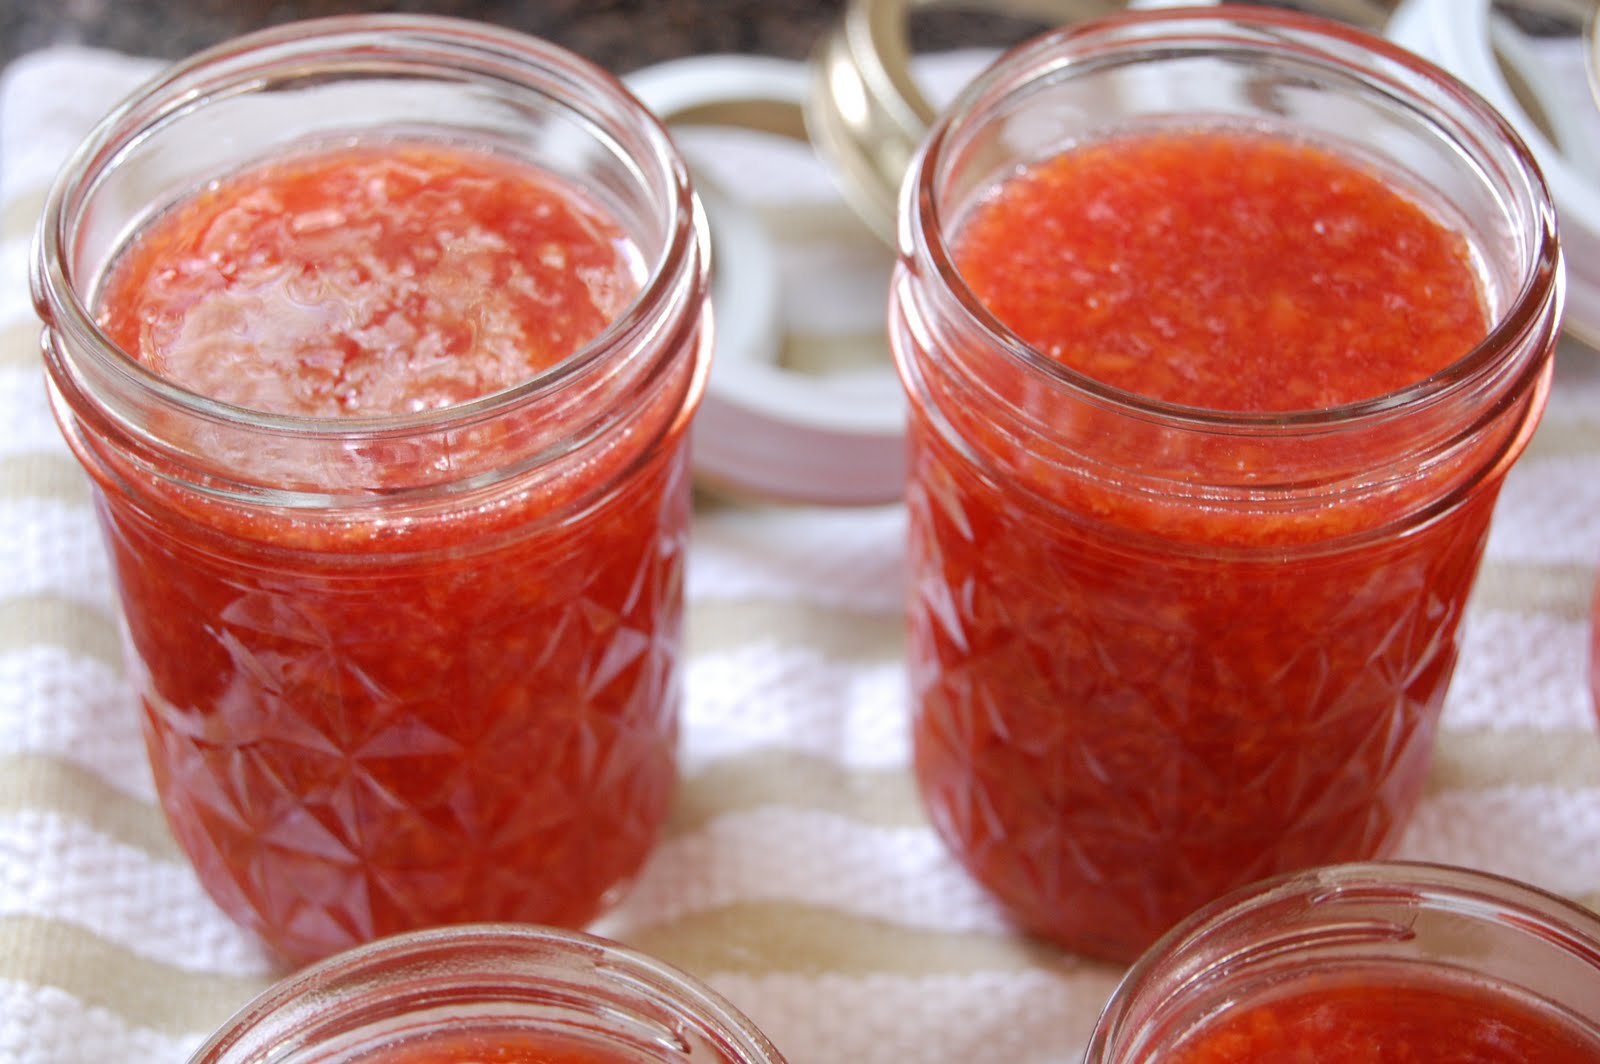 My mom used to make jam for us when I was growing up. It was always more flavorful than the store-bought stuff, plus it was a great way to use up fruits that we picked from out back yard and our CSA. I tend to get a little manic about making jam, but we always use it, and we give a number of jars away to appreciative friends and family members. My husband will pretty much only eat homemade strawberry jam now, so in the spring we make a pilgrimage to an absolutely amazing strawberry farm in New Jersey. It's a bit of a drive, but it's well worth the trek-- they really have the best berries. I always buy at least 10 quarts of strawberries (despite the dirty looks we get from the people behind us in line), and when we get home at the end of the day, we wash them, hull them, and throw them in the food processor. Ball's directions says not to do this, but I've been doing it for years without a problem. After I've pulsed the berries down to the consistency we like (no slimy chunks), I divide the purée into 5 cup increments (either in containers, labeled at the top with permanent marker, or in seal-a-meal type bags that I double bag and then stick into thick gallon-size freezer bags). By doing this, I can stick all of the fresh fruit right into the freezer and don't have to worry about canning it immediately, and I've saved myself an important step later on. I do the same for sour cherries and blackberries when they're in season, although the increments are different.
When you buy the Ball No Sugar Needed Fruit Pectin, there are tons of recipes,
 pictures, and all of the directions you'll need inside. I more or less follow all of their directions... except that I NEVER add the juice or water that all of their recipes call for. I found that the few times I mistakenly did add the extra liquid that the jams never jelled properly. Some people use Sure-Jell, but I always stick to Ball (whose website stinks, hence the lack of hyperlink).
J'adore: Homemade Jam

Ingredients for Strawberry jam:
5 cups mashed or puréed strawberries**
1 packet Ball Fruit Jell No Sugar Needed Pectin
1.5-2 cups granulated sugar*
Ingredients for Sour Cherry jam:
4 cups chopped and pitted sour cherries
1 packet Ball Fruit Jell No Sugar Needed Pectin

2 cups granulated sugar*
Ingredients for Berry Berry Cherry jam:
2 cups blackberry juice
2 cups mashed or puréed strawberries
2 cups chopped and pitted sour cherries
1 packet Ball Fruit Jell No Sugar Needed Pectin
2 cups granulated sugar*

Directions:
1. Fill a large canning pot with hot water and bring to a boil. Clean jelly jars, lids, and bands with warm soapy water. (I'd recommend 8 8oz. jars to be on the safe side. Although most of the recipes only make around 6 jars, you don't want to end up short, especially if you've added all 3 cups of sugar). Put the clean jars in the canning pot and boil/simmer for at least ten minutes with the lid on. Place the lids in a small pot and boil/simmer for at least ten minutes. Put the bands aside where they will be easy to access.
2. Pour fruit purée into a large cooking pot and turn heat to med-low. Bring fruit to a simmer. Sprinkle the pectin in a little at a time, so as to avoid chunks, stirring constantly. Bring mixture to a full boil, stirring constantly. Once mixture is boiling it is time to add sugar. Start with one cup, stir in completely, and taste to see if it's sweet enough. Continue adding sugar until the desired sweetness has been achieved, but no more than three cups. Bring mixture to a boil again. Boil for one full minute, stirring constantly.
3. Remove from heat and skim foam, if necessary.
4. Remove hot jars from canning pot and turn upside-down onto a clean dishtowel.
5. Ladle hot jam into hot jars leaving 1/4 inch headspace (to the bottom of the jar's threads). Wipe the threads and rim clean if you spill any jam. Place a lid onto the jar and secure by tightening the band onto the jar. Place full jars back into the boiling canning pot, making sure that the jars are covered by at least 2 inches of water.
6. Process jars in the boiling water for 10 minutes with the lid on.
7. Carefully remove the jars from the boiling water and place on a clean dishtowel. When all of the jars have been placed on the towel, cover them lightly with another clean dishtowel.
8. Listen for the jars' lids to pop. Usually this will only take an hour or two, but it can take up to 24 hours for all the lids to pop. You'll know that a lid has created a seal when the center of the lid is concave. DO NOT press on the lids if they have not sealed on their own! If, after 24 hours, your jars still haven't sealed, just stick them in the fridge.
9. Label sealed jars and store in a cool, dry, dark place. Jam will keep for about a year, if you have it around that long!
*You can use anywhere from no sugar to 3 cups of sugar depending on your personal preference and depending on the batch of fruit you're using. I always use at least one cup of sugar and then add more based on taste. Do not add more than 3 cups of sugar.
**9 quarts of fresh strawberries makes 3 batches of jam: 18 8oz. jars, 4 4oz. jars; 2 quarts makes approx. 5 cups of purée .
Thursday, July 15, 2010
Roasted Eggplant Lasagna
 Found this recipe when we were blow-drying my mom's cookbooks after a leak in the kitchen. It's adapted from the Williams-Sonoma Pasta cookbook. I loved the addition of the goat cheese; it was delicious!
J'adore: Roasted Eggplant Lasagna
Ingredients:
1/2 a large eggplant, diced
2 zucchini, diced

1 red or orange bell pepper, diced
1 onion, diced
8-10 mini plum tomatoes OR 4 regular size tomatoes, diced
1 can fire roasted diced tomatoes with roasted garlic
4 cloves garlic, minced or pressed
olive oil
4 sprigs fresh rosemary, minced
1 lb. (med. container) tomato sauce*

1 package fresh lasagna sheets*
1 lb. (1 med. size container) fresh ricotta cheese*
1 small log (5 oz.) goat cheese
1/2 cup half and half, milk, or cream
leaves from 2-3 sprigs fresh parsley, chopped or minced
grated parmesan or romano cheese
Directions:

Dice the eggplant, zucchini, onion, bell pepper, and rosemary. Mix them together in an oven-safe baking dish, drizzle with olive oil, sea salt, and pepper, toss to coat, and bake at 450°F for approximately 35 mins. The vegetables should be cooked and lightly browned.
In a skillet or sauce pan combine diced tomatoes, fire roasted
 tomatoes, garlic, and some olive oil. Turn heat to med-low and simmer for approximately 15 minutes while the other vegetables are roasting.
In a separate bowl, combine ricotta, goat cheese, half and half, and chopped parsley.
To assemble the lasagna, first pour some tomato sauce into the
 bottom of your lasagna dish. Place a layer of pasta over the sauce. Spread 1/3 of the roasted vegetables onto the pasta and drizzle or spread 1/4 of the tomato mixture over it. Add another layer of pasta, another layer of veggies, and some more of the tomato mixture or sauce. This time, dot with the cheese blend before adding your next layer of pasta. Continue with one more layer containing cheese, tomatoes and/or tomato sauce, and roasted veggies. I usually sprinkle some grated parm. or romano cheese on each layer as well. Once you have your final layer of pasta over the cheese and veggies, top with the remaining tomato mixture and ample sauce to cover all of the pasta. Sprinkle with more grated cheese. Bake at 350°F for approximately 45 minutes.
*I am spoiled and always get fresh pasta sheets, fresh ricotta, and sauce from Carlino's Italian Market in West Chester or Ardmore. If you can get fresh, use it because it makes a far superior lasagna.
Saturday, July 10, 2010
Pickles
This year one of the other teachers at school gave me some cucumber seedlings. Insanely, I planted all 15 of them in my new (2nd) veggie bed. The cukes loved the township compost, and just this week I've picked over 25 cucumbers. I've never pickled anything before, but what else can you do with so many cucumbers?
Today I'm trying two different pickle recipes in the hopes that at least one, if not both, will be good. Of course, waiting will be the hardest part: at least 3-4 weeks just to taste test a jar!
The first recipe is from my neighbor's Whole Living July/August 2010 magazine. As usual, I made some modifications.
Sour Pickles
(makes 4 pints)
3.75 lbs. cucumbers (approx. 6 or 7, 3-4in. cukes)
1/3 cup pickling salt plus 1 tsp.
2 1/2 distilled white vinegar
2 1/2 cups water (I used filtered from the Brita)
pickling spice
8 cloves garlic, halved
8-16 sprigs fresh dill
Pickling Spice:
1 Tbsp. whole black peppercorns
1 Tbsp. yellow mustard seed
1 tsp. whole allspice
1/3 cinnamon stick, crumbled
The Night Before:
Trim down both ends of the cucumbers with a knife. Apparently, leaving the ends on create some funky results. I had to trim them down anyway to make the cucumbers fit in the pint-sized jars. Cut cucumbers into spears. Put spears in a large bowl, add 1/3 cup pickling salt, cover with cool water, and mix to dissolve salt. Put a small plate over the spears to keep them submerged, and stick the bowl in the fridge overnight (or 12 to 18 hours).
On the second day:
1. Prepare the pint-sized jars by washing them with warm, soapy water. Place them in a large canning pot or other large pot. Fill the pot with hot water making sure that all of the jars are level, rim-up, and covered by at least an inch of water. Cover the pot and bring to a boil. Jars will need to boil for at least 10-15 minutes. Leave them simmering in the pot as you prepare everything else.
2. Wash the bands and lids with warm soapy water. Put the lids in a small pot of water and bring them to a boil. Dry the bands and put them to the side.
3. Drain the cucumbers and rinse thoroughly.
4. Bring vinegar, water, and 1 tsp. pickling salt to a boil.
5. Lift jars out of the water one at a time making sure to empty all of the water back into the canning pot. Lay jar on its side on a kitchen towel. Add two garlic halves to the bottom and fill jar half-way with spears. Place 2-3 sprigs of dill in the center, and continue filling the rest of the jar with spears. Turn upright, add two more garlic halves and one tsp. (plus a little) pickling spice. Fill with boiling pickling liquid leaving 1/2-inch head space.
6. Slide a non-metal spatula or chopstick into the jar between spears to release any extra air bubbles. Lightly tapping the jar on the towel is another way to release some of the extra bubbles.
7. Make sure the the rim and threads of the jar are clean. Place dome lid on top of jar and screw the band down .
8. Repeat with the rest of the jars.
9. Once all of the jars are filled, gently place them back into the canning pot. Make sure that the jars are covered by at least 2 inches of water.
10. Boil steadily for 10 minutes.
11. Carefully remove jars and place on a clean kitchen towel out of the way somewhere. Cover lightly with a lightweight cloth, and listen for pops over the next few hours.
12. Store in a cool, dark place.
Side notes:
1. In crawling the internet for pickling recipes, almost ALL of the comments mentioned to only use pickling salt because other salts make pickles cloudy and dark.
2. The original recipe calls for three times the amount of spices to make the pickling spice. I found that 1/3 of the amount (which is the amount I've listed above) was more than enough.
3. Any time you do canning you have to use new dome lids. You can re-use the jars and bands, but the dome lids will only make a seal once. (If you buy new jars, those dome lids are good.)
4. I always process an extra jar or two, just in case. Depending on the size of your cukes or how loosely you pack them, you may end up with 5 or 6 jars.
5. DON'T press on the lids to check to see if they've popped! If you pop the lid yourself, you'll have to re-process with a new lid. Wait 12-18 hours before checking the lids to make sure they've sealed. Generally, you can look at the tops to see if the dome is concave. If you can't tell, and you haven't been around to hear the popping, then you can gently press in the center of the lid. If it's already down, you're in good shape. If it's not, you'll need to process the jar again with a new lid.
The second recipe I found at allrecipes.com. Here's the link to the original recipe. The comments other people made were pretty helpful. Again, hopefully these pickles will taste good in two months!!
Dill Pickles
(makes 10 pints)
8 lbs. cucumbers*
4 cups white vinegar
12 cups water
1/2 cup pickling salt
16 cloves of garlic, peeled and halved
8-16 sprigs and flower heads fresh dill
mustard seed, dill seed, hot pepper flakes (optional)*
1. Wash and cut cucumbers as in the first recipe. Place spears in dish of ice water (or in the kitchen sink, filled with ice and cold water) and let sit for two hours, replenishing the ice often.
2. Sterilize jars and lids as in first recipe.*
3. Bring water, salt, and vinegar to a boil in a large pot.
4. Add 2 half-cloves of garlic to the bottom of each jar, fill with cucumbers, add fresh sprigs of dill, and another 2 half-cloves of garlic.
5. Process jars as in the first recipe.
*After the first batch (top recipe), I only had 5 lbs. of cucumbers left. I'm pretty sure that having enough jars and enough brine is what's key. Having a few more or less cukes shouldn't be a problem.
*The original recipe calls for 8 quart-sized jars. I needed 10 pint-sized jars for my 5lbs. of cukes.
*The original recipe may mean that you are supposed to ice the cukes whole, then cut them. I iced the spears. Right away I noticed that the spears from the second recipe are much firmer than the ones from the first recipe. You wouldn't think that a few degrees or a few hours would make that drastic a difference, but it did.
*A number of people on all recipes made comments about adding dill seeds, mustard seed, or hot pepper flakes to their pickles. As I was in an experimental mood, I tried 2 jars with scant 1/4 tsp. each dill seed and mustard seed, and 2 with scant 1/4 tsp. each rep pepper flakes and mustard seed (in addition to the dill and garlic). The rest I made plain with lots of dill and 2 cloves of garlic.
Today I'm trying two different pickle recipes in the hopes that at least one, if not both, will be good. Of course, waiting will be the hardest part: at least 3-4 weeks just to taste test a jar!
The first recipe is from my neighbor's Whole Living July/August 2010 magazine. As usual, I made some modifications.
Sour Pickles
(makes 4 pints)

3.75 lbs. cucumbers (approx. 6 or 7, 3-4in. cukes)
1/3 cup pickling salt plus 1 tsp.
2 1/2 distilled white vinegar
2 1/2 cups water (I used filtered from the Brita)
pickling spice
8 cloves garlic, halved
8-16 sprigs fresh dill
Pickling Spice:

1 Tbsp. whole black peppercorns
1 Tbsp. yellow mustard seed
1 tsp. whole allspice
1/3 cinnamon stick, crumbled
The Night Before:
Trim down both ends of the cucumbers with a knife. Apparently, leaving the ends on create some funky results. I had to trim them down anyway to make the cucumbers fit in the pint-sized jars. Cut cucumbers into spears. Put spears in a large bowl, add 1/3 cup pickling salt, cover with cool water, and mix to dissolve salt. Put a small plate over the spears to keep them submerged, and stick the bowl in the fridge overnight (or 12 to 18 hours).
On the second day:
1. Prepare the pint-sized jars by washing them with warm, soapy water. Place them in a large canning pot or other large pot. Fill the pot with hot water making sure that all of the jars are level, rim-up, and covered by at least an inch of water. Cover the pot and bring to a boil. Jars will need to boil for at least 10-15 minutes. Leave them simmering in the pot as you prepare everything else.

2. Wash the bands and lids with warm soapy water. Put the lids in a small pot of water and bring them to a boil. Dry the bands and put them to the side.
3. Drain the cucumbers and rinse thoroughly.
4. Bring vinegar, water, and 1 tsp. pickling salt to a boil.
5. Lift jars out of the water one at a time making sure to empty all of the water back into the canning pot. Lay jar on its side on a kitchen towel. Add two garlic halves to the bottom
 and fill jar half-way with spears. Place 2-3 sprigs of dill in the center, and continue filling the rest of the jar with spears. Turn upright, add two more garlic halves and one tsp. (plus a little) pickling spice. Fill with boiling pickling liquid leaving 1/2-inch head space.
6. Slide a non-metal spatula or chopstick into the jar between spears to release any extra air bubbles. Lightly tapping the jar on the towel is another way to release some of the extra bubbles.
7. Make sure the the rim and threads of the jar are clean. Place dome lid on top of jar and screw the band down .

8. Repeat with the rest of the jars.
9. Once all of the jars are filled, gently place them back into the canning pot. Make sure that the jars are covered by at least 2 inches of water.
10. Boil steadily for 10 minutes.
11. Carefully remove jars and place on a clean kitchen towel out of the way somewhere. Cover lightly with a lightweight cloth, and listen for pops over the next few hours.
12. Store in a cool, dark place.
Side notes:
1. In crawling the internet for pickling recipes, almost ALL of the comments mentioned to only use pickling salt because other salts make pickles cloudy and dark.
2. The original recipe calls for three times the amount of spices to make the pickling spice. I found that 1/3 of the amount (which is the amount I've listed above) was more than enough.
3. Any time you do canning you have to use new dome lids. You can re-use the jars and bands, but the dome lids will only make a seal once. (If you buy new jars, those dome lids are good.)
4. I always process an extra jar or two, just in case. Depending on the size of your cukes or how loosely you pack them, you may end up with 5 or 6 jars.
5. DON'T press on the lids to check to see if they've popped! If you pop the lid yourself, you'll have to re-process with a new lid. Wait 12-18 hours before checking the lids to make sure they've sealed. Generally, you can look at the tops to see if the dome is concave. If you can't tell, and you haven't been around to hear the popping, then you can gently press in the center of the lid. If it's already down, you're in good shape. If it's not, you'll need to process the jar again with a new lid.
The second recipe I found at allrecipes.com. Here's the link to the original recipe. The comments other people made were pretty helpful. Again, hopefully these pickles will taste good in two months!!
Dill Pickles

(makes 10 pints)
8 lbs. cucumbers*
4 cups white vinegar
12 cups water
1/2 cup pickling salt
16 cloves of garlic, peeled and halved
8-16 sprigs and flower heads fresh dill
mustard seed, dill seed, hot pepper flakes (optional)*
1. Wash and cut cucumbers as in the first recipe. Place spears in dish of ice water (or in the kitchen sink, filled with ice and cold water) and let sit for two hours, replenishing the ice often.
2. Sterilize jars and lids as in first recipe.*
3. Bring water, salt, and vinegar to a boil in a large pot.

4. Add 2 half-cloves of garlic to the bottom of each jar, fill with cucumbers, add fresh sprigs of dill, and another 2 half-cloves of garlic.
5. Process jars as in the first recipe.
*After the first batch (top recipe), I only had 5 lbs. of cucumbers left. I'm pretty sure that having enough jars and enough brine is what's key. Having a few more or less cukes shouldn't be a problem.
*The original recipe calls for 8 quart-sized jars. I needed 10 pint-sized jars for my 5lbs. of cukes.
*The original recipe may mean that you are supposed to ice the cukes whole, then cut them. I iced the spears. Right away I noticed that the spears from the second recipe are much firmer than the ones from the first recipe. You wouldn't think that a few degrees or a few hours would make that drastic a difference, but it did.
*A number of people on all recipes made comments about adding dill seeds, mustard seed, or hot pepper flakes to their pickles. As I was in an experimental mood, I tried 2 jars with scant 1/4 tsp. each dill seed and mustard seed, and 2 with scant 1/4 tsp. each rep pepper flakes and mustard seed (in addition to the dill and garlic). The rest I made plain with lots of dill and 2 cloves of garlic.
Thursday, November 26, 2009
Peanut Butter Cup Cookies

These cookies are the best peanut butter cookies I've ever had. Whereas so many other peanut butter cookies tend to be dry, these are moist and delectable. I tend to make these to take to parties, and normally it's all I can do to keep my husband from eating all of them before we get to our destination. I think the original recipe is from a Hershey's cookbook, but I'm not certain. You're supposed to make a huge roll of dough and make can-sized cookies, but I just make regular-sized cookies and skip the log step. I use Skippy... not sure how they would turn out with natural peanut butter. Makes about 30 cookies.
J'adore: Peanut Butter Cup Cookies
Ingredients:

3/4 cup chunky peanut butter
1/2 cup (1 stick) butter, softened
1 cup packed light brown sugar
1/2 tsp. baking powder
1/2 tsp. baking soda
1 egg
1 1/2 tsp. vanilla
1 1/4 cups flour
2 cups quartered mini peanut butter cups
Directions:
Cream peanut butter and butter with a mixer or in a food processor. Add sugar, baking powder, and baking soda, and blend again. Add egg and vanilla, and blend again. Blend in flour slowly until just mixed. Stir in peanut butter cups, cover, and refrigerate for approx. 1 hour.
Form cookies into patties of desired size, and place on cookie sheets. Bake at 375 for 10 minutes or until lightly browned. The trick with these cookies is not to cook them for a minute too long! They have to be just starting to lightly brown to be prefect. Allow to cool for a few minutes on the trays before transferring to a cookie rack.
Wednesday, November 25, 2009
Thanksgiving Staple and Side
Mollie Katzen's Spinach Ricotta Cheese Pie has been a favorite in my family for as long as I can remember. I always requested it for my birthday, my cousin always requested it for Thanksgiving and Christmas, my husband drops not-so-subtle hints every time it's been a while since I've made it, even a co-worker's mother demanded the recipe for days on end until I finally wrote it down for her. In short, it's one of the best savory pies I've ever had, and it has become a Thanksgiving tradition in our family. The recipe is from the original Moosewood Cookbook but was sadly omitted from the new edition. As usual, changes have been made over time. I'm also including a recipe for a side that I LOVE. The original recipe comes from a story I heard on NPR last year.
Je ne peux pas vivre sans: Spinach Ricotta Cheese Pie
Ingredients:
1 pie shell (I use a store-bought deep-dish shell to save on time. Feel free to make your own!)
1.5 packages of chopped frozen spinach
1 small onion
1 pint ricotta cheese
1/2 cup grated cheddar cheese
2 eggs
1/2 tsp. salt
fresh, frozen, or dried basil (fresh is always best)
sour cream
Directions:
Steam spinach and drain thoroughly. Be sure to press out all excess water or you'll have a watery pie. Dice onion and saute in olive oil. Combine spinach, onion, ricotta, eggs, salt, cheddar, and basil in a mixing bowl. If you're afraid that the spinach is still too watery you can add a tablespoon of flour. Spread mixture evenly in pie shell. Spread sour cream over the top of the spinach mixture. You can use as much or as little sour cream as you want. I prefer to use a lot and spread it to the edges-- it's my favorite part of the pie. Bake at 350 for 45 minutes.
J'adore: Wild Rice Stuffing
Ingredients:
2 cups vegetable broth
1 cup wild rice*
1/4 cup dried cranberries (or other dried berry)
1/2 cup walnuts
salt and pepper to taste
Directions:
In a pot, bring the vegetable broth to a boil and add the rice. Cover, and reduce heat to low. Simmer until all liquid is absorbed and rice is tender (about 30 mins). Add cranberries, walnuts, salt and pepper to taste, and serve. Can be served inside a cooked acorn squash.
*I use half wild rice, half Brown Rice Medley from Trader Joe's, which has brown rice, black barley, and daikon radish seeds.
Subscribe to:
Posts (Atom)