Wednesday, May 8, 2013

Asparagus Strata


Asparagus Strata
1 onion
1 or 2 bunches of asparagus
Basil (I used 2 cubes of frozen, but you could chop up fresh or use dried)
1 loaf bakery bread, cubed (you can use French bread, whole wheat, sourdough, etc., just don’t use     sandwich bread)
8 eggs
2 cups milk
1 tsp. Dijon mustard (optional)
salt and ground pepper
Colby-jack and/or cheddar cheese, grated

1.       Grease a large, glass casserole dish
2.       Cut bread into cubes.  Put half of the cubes in the casserole dish.
3.       Dice onion and asparagus.  Sauté the onion in olive oil or butter until translucent.  Add asparagus and cook until tender.
4.       Add salt, pepper, and basil
5.       Grate the cheese, and put a layer of cheese over the first layer of bread.
6.       Wait for the veggies to cool then add them to the casserole dish.
7.       Top with the second half of the bread cubes and top with more grated cheese.
8.       In a mixing bowl, beat the eggs, milk, and mustard with a hand mixer.
9.       Pour egg mixture over the bread, cover, and stick in the fridge overnight.
10.   Remove covering the next morning, pre-heat the oven to 375.  Cook for 45 minutes or until a knife inserted into the middle comes out clean.  You want to make sure the egg has cooked in the middle.

Tuesday, August 14, 2012

Canning Salsa

I, being the logical person that I am, and knowing that I have infinite time available with an almost one year old, decided that it would be best to make favors for the adults coming to my almost one year old's first birthday party.  Since he loves Mexican food (what baby doesn't?), we decided to go with a fiesta theme.  And the adult favor?  Why, home made salsa, of course! 

I will say that this salsa is pretty darn good.  I took a pint to my aunt's, and my husband and I barely even got any it was gone so fast.  That being said, it is extremely time consuming, labor intensive, and requires a TON of ingredients.  If this sounds like something right up your alley, read on.

Until Google told me, I had no idea that salsa recipes had to be FDA approved-- or at least the tomato-vegetable ratios have to be.  I used two sites to guide me: one and two.  Here is what I came up with:

*If you are new to canning, you may want to check out some more detailed instructions on my Pickles or Jammin' posts.


J'adore: Fiesta Salsa

14 cups peeled, seeded, chopped plum tomatoes
2 1/2 cups diced onion
2 1/4 cups diced/minced peppers
           My pepper breakdown was as follows:
           1/2 a green bell pepper
           1/2 a red bell pepper
           3 jalepenos
           2 Hungarian wax peppers
           2 long, green chillies, medium heat (can't remember the name)
3 cloves of garlic, minced
1 cup lemon juice from a bottle, not fresh squeezed
1 Tbsp salt (add 1 tsp. at a time; 3 tsp. may be too much salt for you; it almost was for me)
1/2 tsp. cracked black pepper
1 Tbsp minced, fresh oregano
5 Tbsp minced, fresh cilantro

You'll need at least 15 pounds of tomatoes to get those 14 cups. Bring a pot of water to a boil, and prepare another bowl with ice water.  Put a colander/strainer in a second bowl to the side.  Slice a small X in the bottom of each of your tomatoes.  (I'm assuming you've washed them first.)  Put your scored tomatoes in the boiling water for 30-60 seconds.  Remove them with a slatted spoon, and put them in the ice water.  Remove from the ice water, peel away skin, cut in half across, not longways, and scoop the seeds out into your colander/strainer.  You may also want to remove the tough cores.  Ahh, you'll need a third bowl or a food processor bowl to put your processed tomatoes in.  Repeat with the rest of your tomatoes.  Dice your prepared tomatoes or pulse them in the food processor until you have the consistency you want.  

Once you've gotten all of your tomatoes prepped, dice or mince your onion, peppers, and herbs.  I pulsed everything but the onions in the food processor but separately so that I could measure the appropriate quantities.

Using a large sauce pot, bring your tomatoes to a simmer.  Add the other ingredients and return to a simmer.  Adjust the spices and herbs according to your taste, but you can't adjust the tomato/onion/pepper ratios.  You may change the types of peppers, but you'll need to have 2 1/4 cups total.  We did a lot of taste testing by scooping small amounts of the salsa into a bowl and adding ingredients before I put them in the big pot.  We decided that cumin made it too cuminy, and I wanted a fresh tasting salsa, so we skipped it.  We also skipped the chili powder for a similar reason.  The instructions on one of the links above says to let it simmer for 30 minutes.  Let me tell you, mine simmered for way longer than that while I was trying to get 6,000 other things accomplished.

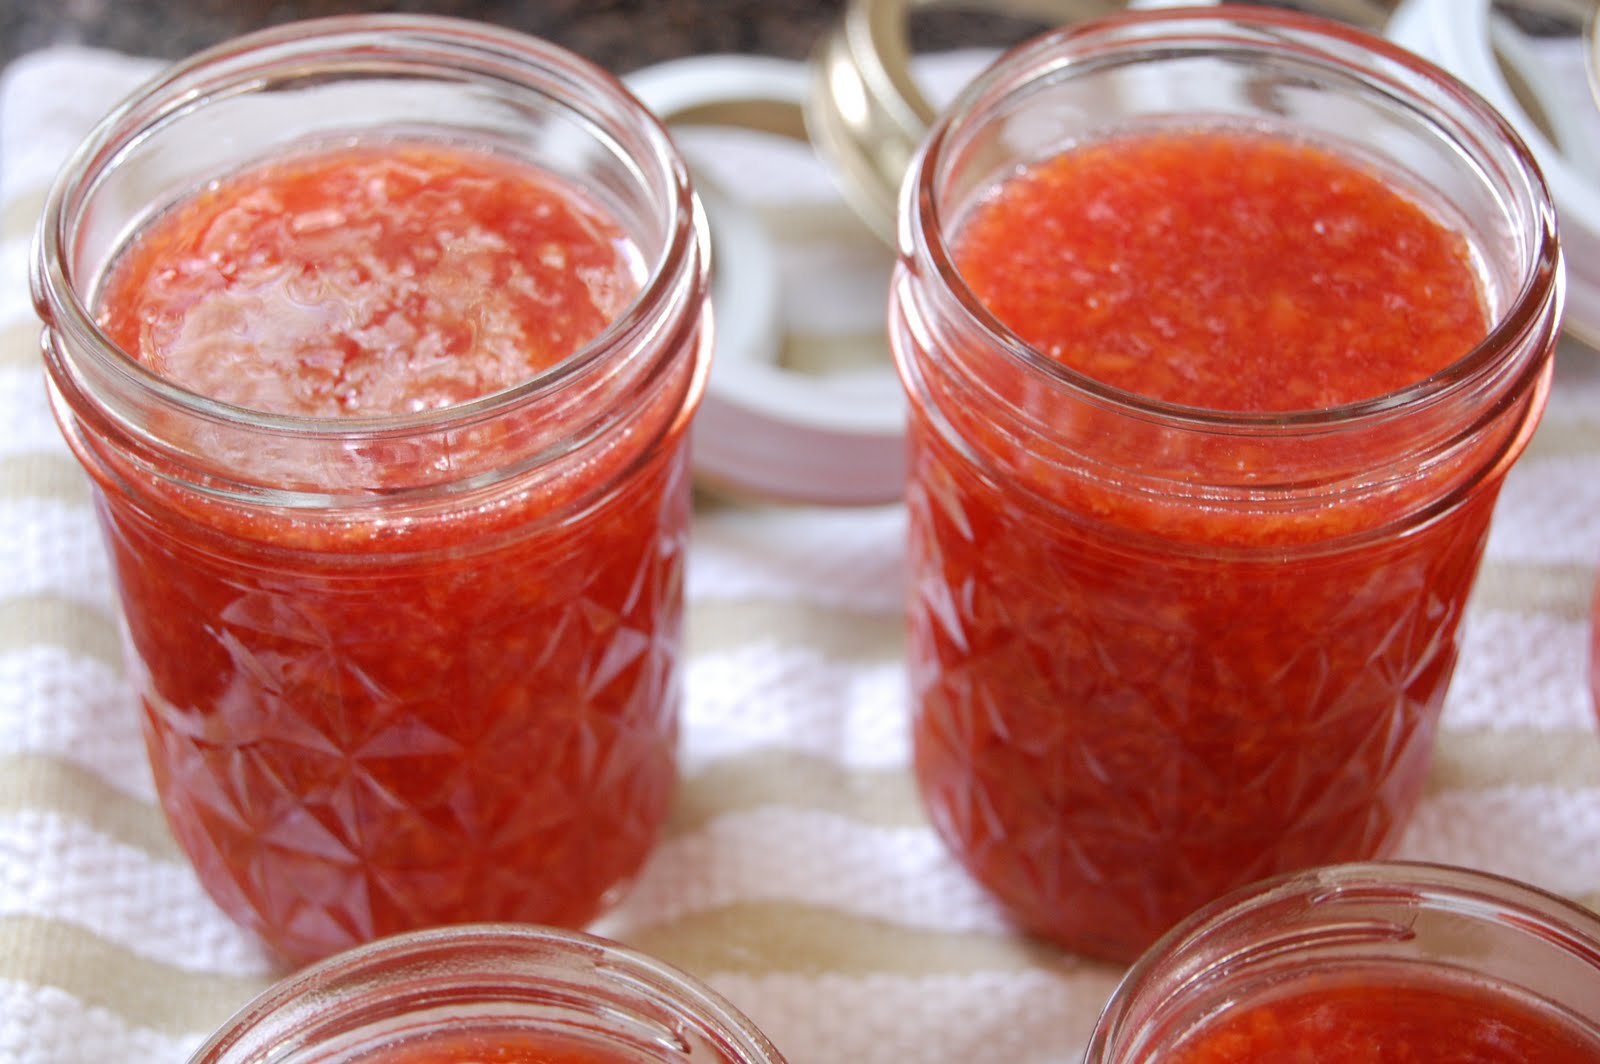
This recipe made 16 half pints and 2 pints, so 10 pints total.  I liked the squat jars for gifts because they're more visually appealing (i.e. cuter).  I processed the jars for 15 minutes a batch in the boiling water bath.  Again, if you haven't canned before, please do some reading up on it.

I almost forgot: as an added bonus, keep the tomato juice you caught in your second bowl.  Scrape everything through the strainer so that you're left with only the seeds.  At my house, the seeds and skins go in the compost which is why you see that white yogurt container in the picture.  Drink the juice, if you like tomato juice, or you can chop up some basil in it and freeze it to add to soups and other recipes later on.

Enjoy!


Monday, November 14, 2011

Sweet Potato Sticky Buns

These sticky buns are amazing, easy to make, and can easily be made vegan. The original recipe appears in the Nov. 2011 issue of Vegetarian Times, but I made a few tweaks, as usual. They seem to be best made a day ahead of time and then reheated before serving.


J'adore: Sweet Potato Stick Buns

For the dough:
1 0.25-oz. package active dry yeast
3 cups bread flour, plus more for rolling dough
2 Tbs. sugar
1 1/2 tsp. salt
2/3 cup mashed sweet potato*
3 Tbs. vegetable oil, plus a dash for oiling the bowl

For the filling:
1/3 cup packed light brown sugar
1 3/4 tsp. ground cinnamon
1/2 stick butter or vegan margarine, melted
chopped pecans or walnuts, optional

For the pan:
1 stick butter or vegan margarine, melted
2-3 Tbs. light brown sugar or use leftover filling

For the icing:
8 oz. cream cheese or vegan cream cheese
2-3 tsp. natural maple syrup
a pinch of sea salt/ 1-2 twists of grinder
confectioners' sugar (the recipe says 1 cup; I just dumped some in but probably less than a cup)

1. stir yeast into 1/3 cup warm water until dissolved. Let stand 10 minutes.
2. Combine flour, sugar, and salt in food processor fit with bread hook.
3. Stir sweet potato and oil into 1/3 cup warm water. (I just used a large measuring cup-- easier for pouring.)
4. When 10 minutes is up, stir yeast into sweet potato mixture.
5. Turn food processor on, and pour liquids through the feeding tube in the lid. Allow to run until dough forms a ball.
6. Remove dough from food processor and place into a large, oiled bowl. Cover with a barely damp, light-weight dish cloth, and allow to rise for 2-3 hours or until dough completely fills the bowl. (I warm up my oven as I'm making the dough then turn it off and stick the dough in to rise. If you have another warm spot, that will work too.)
7. Prepare filling by mixing together brown sugar and cinnamon, although you could just as easily just spread the brown sugar on the rolled-out dough and then shake cinnamon on top of that.
8. Grease large glass dish (9x13? I don't know how big any of my dishes are) with melted (vegan) butter, making sure to get all the way up the sides.
9. Sprinkle flour over a clean work surface, and turn dough onto it. Sprinkle a little more flour on top of dough and rub some onto your rolling pin. Roll out dough into a large rectangle.
10. Spread rolled-out dough with melted (vegan) butter (enough to coat evenly, but not enough to make a runny mess when you're rolling and cutting), then sprinkle with sugar and cinnamon mixture. You may also add chopped pecans or walnuts to the filling, but I choose not to since some people don't like nuts.
11. If you want larger buns, start with the back of the dough and start rolling it toward you so that you make one big dough tube. If you prefer to make smaller buns that will feed more people, cut the dough in half horizontally and make two dough logs.
12. Cut dough log into approx. 1" thick pieces. The original recipe says to cut off and discard the ends. Madness, I say! Just turn them so that the cut side is up. Waste not, want not!
13. Pour remaining butter into the bottom of the baking dish. Sprinkle any left over brown sugar/cinnamon mixture into the butter in the dish. If you've used it all already in the rolls, simply make some more. This helps to make the buns more like sticky buns and not so dry around the edges.
14. Place dough slices spiral-side up across the dish. Leave room for them to rise.
15. Stick the dish back in a warm spot, covered again with the barely damp dish towel, and allow to rise again for at least an hour.
16. Bake buns at 375° for 18-20 minutes, or until golden brown on top.
17. To make the icing, combine the maple syrup, cream cheese, and sea salt. Add in the confectioners' sugar and mix.
18. Spread the icing over the buns straight out of the oven. Top with chopped pecans or walnuts, if desired.


*I boiled the sweet potatoes until soft and then blended them in the food processor. The first time I tried baking the sweet potatoes and then mashing them, but the buns turned out far superior with the added moisture of the boiled potatoes. Cut up 1 or 2 large sweet potatoes and use the left over mash for dinner or baby food.

Sunday, May 22, 2011

Baked French Toast

This recipe is super easy and can be prepared ahead of time. Perfect for brunch.

J'adore: Baked French Toast

Ingredients:
1 cup brown sugar, packed
1/2 cup butter, melted
2 tsp. maple syrup
3-4 eggs
1 1/2 cups milk or half and half
1 tsp. vanilla
1 baguette, sliced into 1-in. thick slices

Directions:
1. Grease the bottom and sides of a 9x13" baking dish. (I use margarine.)
2. Combine brown sugar, butter, and maple syrup. Spread on the bottom of the baking dish.
3. Place bread slices flat onto bottom of baking dish.
4. Combine eggs, milk, and vanilla. Pour evenly over bread slices.
5. Cover, and stick in the fridge over night.
6. Bake at 350° for 30-40 minutes or until tops of bread look browned and the egg mixture is set.

Wednesday, December 29, 2010

Chocolate Peanut Butter Surprise Cupcakes

This recipe comes from Sara Perry's Holiday Baking: New and Traditional Recipes for Wintertime Holidays. I found the original icing way too sweet, but, once modified, the overall result was pretty tasty. I think the best part of the recipe is the idea of putting peanut butter in the middle of the cupcake and peanut butter icing on the top. You could probably just use your favorite cake recipe-- chocolate or otherwise-- and just use the filling and icing from this recipe. I may consider trying the filling/icing with our family birthday cake at a later date.

J'aime beaucoup: Chocolate Peanut Butter Surprise Cupcakes

Peanut Butter Filling:
3 ounces cream cheese, at room temperature
1/4 chunky peanut butter
2 Tbs honey
2 Tbs powdered sugar
1 Tbs heavy whipping cream

Cupcake Batter:
1 cup flour
1/3 cup unsweetened cocoa powder
1 tsp. baking soda
1/2 tsp. salt
1/2 cup butter, at room temperature
1 cup firmly packed light brown sugar
2 eggs, at room temperature
1 tsp. vanilla
1/2 cup buttermilk*

Icing**:
2 1/2 Tbs butter, at room temperature
3 ounces cream cheese, at room temperature
1/2 cup chunky peanut butter
1 1/2 tsp. vanilla
1 cup powdered sugar
4 Tbs heavy whipping cream

Topping:
chopped peanut butter cups, optional


1. Preheat the oven to 350ºF. Line cupcake tin with liners. Makes 15-21.

For the filling:
2. Cream peanut butter filling ingredients with a hand mixer, and set aside.

For the Cupcakes:
3. In a mixer or food processor, cream the butter. Add in the brown sugar and blend until creamy and well combined. Add the eggs, one at a time, and blend completely. Beat in the vanilla.
4. In a separate bowl, sift together the flour, cocoa, salt, and baking soda.
5. Add half of the sifted dry ingredients to the wet ingredients and blend.
6. Add the buttermilk and blend again.
7. Add the remaining dry ingredients, and blend until everything is smooth and combined. Don't forget to scrape the edges. (The batter seemed thick to me, so don't be alarmed if yours is too)
8. Fill each cupcake wrapper 1/3 of the way with batter (maybe 1 regular tsp.) Divide the filling evenly among the cupcakes by dropping a large dollop (maybe 1 heaping tsp.) of the peanut butter filling into the center of each cupcake. Gently nudge it into the batter. Fill the cupcakes with the remaining batter; each one should be approx. 3/4 full.
9. Bake on the center rack until the tops spring back when lightly touched with a finger, approx. 20 minutes. Do not overbake. Cool cupcakes in the tin for 5 minutes, then transfer to a cooling rack. Cool completely before icing.

For the icing:
10. Cream the butter, cream cheese, peanut butter, and vanilla until light and fluffy. Alternately add the sugar and cream until the icing is smooth.
11. Ice your cupcakes.
12. Top with chopped peanut butter cups, if desired. Cupcakes may be stored at room temperature for 2 to 3 days... if they last that long!


*I used half plain yogurt, half milk to make buttermilk.
** The original icing recipe calls for 2 cups of powdered sugar and only a quarter cup of peanut butter. I followed the original recipe, found it to be too sweet, and added peanut butter and cream to fix it. The ingredients I've listed here for the icing are more or less a guestimate of what should work best-- or at least what I estimate to be close to what I did. You may have to play around with the consistency and flavor by adding more cream, sugar, or peanut butter according to your personal taste.

Saturday, September 11, 2010

Christie's Pesto Tortellini Salad

This is apparently originally a Pillsbury recipe, but I had it at Christie's house, so I attribute the recipe to her. I've modified it a bit (cut out the chicken, mayo, and buttermilk), but it's essentially the same. It's really a delicious combination plus quick, easy, and contains both veggies and protein.

J'adore: Christie's Pesto Tortellini Salad

Ingredients:
1 package refrigerated cheese tortellini
1 cup frozen peas
mixed baby greens or salad green of choice
1 1/2 cups matchstick carrots (buy pre-packaged)
1 red bell pepper, cut into strips
1/2 cup pesto
half and half
grated parmesan-romano cheese

Directions:
Cook tortellini according to package instructions. During the last 3-4 minutes of cooking, add the peas to the tortellini. Drain and rinse with cold water. Rinse and spin salad greens and divide among plates. (If you're serving this at a party you can layer in a big bowl as the original recipe instructs). Add carrot matchsticks, bell pepper strips, peas, and tortellini to salad greens. Serve with Pesto dressing.

To prepare the pesto dressing, slowly add half and half to pesto while stirring to combine. Add only enough half and half to achieve the desired consistency. Add additional grated cheese, if desired.

Monday, August 23, 2010

Pesto

I think you could say that my husband is addicted to pesto. Of course, I never cease to remind him that when we first started dating he wouldn't even try it. Green stuff on pasta? Gross! But then one night I finally convinced him to try a little bite. Then he tried another... and now it's all I can do to keep him from eating it by the spoonful before dinner.

In the spring I buy one of those small pots of organic basil that the grocery store expects people to use in their kitchens. The greatest thing about these pots of kitchen herbs, is that they're filled with a dozen or more seedlings. So, rather than spend $1.99 (minimum) per tiny basil plant at a nursery, I spend $1.99 for anywhere from 12 to 20 healthy, organic seedlings. I plant them outside, and by July I have my own little basil forest. The price savings is really inconsequential when you factor in the expense of the pine nuts, cheese, and olive oil, but I can't see the point in spending $20 on plants when you could just spend $2.

There are many pesto variations, of course, but there are two that stick out most in my mind. The best pesto I ever remember having was in a restaurant on the way to Vermont one summer. I wish that I knew the name of the restaurant, but unfortunately, I don't even know the name of the town. It was from them that I learned to keep some of the pine nuts whole. The second best pesto was an electric green batch that I made when we were living in our first apartment together. That year, I grew the basil on the fire escape. I have no idea what caused the color of the pesto to be so lime green, but it was the best batch I ever made, and I haven't been able to replicate it since.

I never make it the same way twice, and a lot depends on small adjustments for taste, but I've finally written down my recipe for pesto (I had to remind myself to measure). I make multiple huge batches of pesto every summer and freeze it for winter consumption. We eat pesto on pasta, in risotto, on paninis, on salad, and in cold pasta salads. It's pretty versatile, and it's always an easy go-to meal. This recipe will make about 4 cups of pesto; I normally double it.


J'adore: Pesto

Ingredients:
6 medium cloves of garlic
8 oz. pine nuts
3 cups basil leaves
1 cup parsley leaves
2 cups grated cheese (I use a parmesan/romano blend)
1/2 to 1 cup olive oil
sea salt

Directions:
Peel each of the garlic cloves and mince in a food processor. Scrape down the sides and pulse again. Add 7 to 7.5 ounces of the pine nuts and blend until the garlic and nuts make a think, chunky paste. Rinse and spin/dry the basil leaves and parsley. Add three cups of packed basil leaves, one cup of packed parsley, 2 cups of grated cheese, and at least 1/2 a cup of oil to the food processor. Blend until all of the leaves are finely chopped. Add oil to thin to desired consistency. Add a pinch or two of sea salt, if desired. Stir in the remaining whole pine nuts.

Serve with pasta or any way you like!

Notes:
*It's best to harvest the basil early in the morning before the sun gets too hot. Making pesto on a rainy day is another safe bet. The flavor and color tend to be better this way.
*The parsley helps to keep the basil and pesto from turning brown.
*Freezes well, just sit out or in the refrigerator to thaw.
*If storing in the fridge, it will last better with a bit of extra olive oil.
*If you are microwaving, microwave the pasta first, then mix in the pesto. Although pesto tastes great on already heated foods, it does not taste-- or look-- so great when it is heated directly in a microwave or pot.
*It would be easier to just throw everything in the food processor and press the on button, but then you end up with big chunks of garlic unevenly spread throughout the pesto. In my experience, it's most important to blend the garlic first, then the nuts, and then everything else. This is also the reason that I use so much garlic right from the start. You can always tone it down by adding more pine nuts, cheese, basil, or parsley, according to your taste preferences, but it's hard to add more garlic after the fact.

Monday, August 16, 2010

Spanish Rice

This Spanish rice turned out GREAT! Much better than I expected. We ate it with enchiladas, and it made them taste even better.

J'adore: Easy Spanish Rice

Ingredients:
1 onion, diced
olive oil
1/2 cup brown rice
1 can vegetable broth
1/3 jar (approx. 4 oz.) salsa (I used Trader Joe's Double Roasted Salsa)

Directions:
Saute the diced onion in olive oil in a sauce pot. When onions are cooked, add 1/2 cup rinsed brown rice. Saute for another minute or two. Add vegetable broth, bring to a boil, reduce to a simmer, cover, and simmer until liquid is absorbed and rice is tender. When rice is cooked, stir in the salsa.

Wednesday, August 4, 2010

Jammin'

My mom used to make jam for us when I was growing up. It was always more flavorful than the store-bought stuff, plus it was a great way to use up fruits that we picked from out back yard and our CSA. I tend to get a little manic about making jam, but we always use it, and we give a number of jars away to appreciative friends and family members. My husband will pretty much only eat homemade strawberry jam now, so in the spring we make a pilgrimage to an absolutely amazing strawberry farm in New Jersey. It's a bit of a drive, but it's well worth the trek-- they really have the best berries. I always buy at least 10 quarts of strawberries (despite the dirty looks we get from the people behind us in line), and when we get home at the end of the day, we wash them, hull them, and throw them in the food processor. Ball's directions says not to do this, but I've been doing it for years without a problem. After I've pulsed the berries down to the consistency we like (no slimy chunks), I divide the purée into 5 cup increments (either in containers, labeled at the top with permanent marker, or in seal-a-meal type bags that I double bag and then stick into thick gallon-size freezer bags). By doing this, I can stick all of the fresh fruit right into the freezer and don't have to worry about canning it immediately, and I've saved myself an important step later on. I do the same for sour cherries and blackberries when they're in season, although the increments are different.

When you buy the Ball No Sugar Needed Fruit Pectin, there are tons of recipes, pictures, and all of the directions you'll need inside. I more or less follow all of their directions... except that I NEVER add the juice or water that all of their recipes call for. I found that the few times I mistakenly did add the extra liquid that the jams never jelled properly. Some people use Sure-Jell, but I always stick to Ball (whose website stinks, hence the lack of hyperlink).

J'adore: Homemade Jam

Ingredients for Strawberry jam:
5 cups mashed or puréed strawberries**
1 packet Ball Fruit Jell No Sugar Needed Pectin
1.5-2 cups granulated sugar*

Ingredients for Sour Cherry jam:
4 cups chopped and pitted sour cherries
1 packet Ball Fruit Jell No Sugar Needed Pectin
2 cups granulated sugar*

Ingredients for Berry Berry Cherry jam:
2 cups blackberry juice
2 cups mashed or puréed strawberries
2 cups chopped and pitted sour cherries
1 packet Ball Fruit Jell No Sugar Needed Pectin
2 cups granulated sugar*

Directions:
1. Fill a large canning pot with hot water and bring to a boil. Clean jelly jars, lids, and bands with warm soapy water. (I'd recommend 8 8oz. jars to be on the safe side. Although most of the recipes only make around 6 jars, you don't want to end up short, especially if you've added all 3 cups of sugar). Put the clean jars in the canning pot and boil/simmer for at least ten minutes with the lid on. Place the lids in a small pot and boil/simmer for at least ten minutes. Put the bands aside where they will be easy to access.
2. Pour fruit purée into a large cooking pot and turn heat to med-low. Bring fruit to a simmer. Sprinkle the pectin in a little at a time, so as to avoid chunks, stirring constantly. Bring mixture to a full boil, stirring constantly. Once mixture is boiling it is time to add sugar. Start with one cup, stir in completely, and taste to see if it's sweet enough. Continue adding sugar until the desired sweetness has been achieved, but no more than three cups. Bring mixture to a boil again. Boil for one full minute, stirring constantly.
3. Remove from heat and skim foam, if necessary.
4. Remove hot jars from canning pot and turn upside-down onto a clean dishtowel.
5. Ladle hot jam into hot jars leaving 1/4 inch headspace (to the bottom of the jar's threads). Wipe the threads and rim clean if you spill any jam. Place a lid onto the jar and secure by tightening the band onto the jar. Place full jars back into the boiling canning pot, making sure that the jars are covered by at least 2 inches of water.
6. Process jars in the boiling water for 10 minutes with the lid on.
7. Carefully remove the jars from the boiling water and place on a clean dishtowel. When all of the jars have been placed on the towel, cover them lightly with another clean dishtowel.
8. Listen for the jars' lids to pop. Usually this will only take an hour or two, but it can take up to 24 hours for all the lids to pop. You'll know that a lid has created a seal when the center of the lid is concave. DO NOT press on the lids if they have not sealed on their own! If, after 24 hours, your jars still haven't sealed, just stick them in the fridge.
9. Label sealed jars and store in a cool, dry, dark place. Jam will keep for about a year, if you have it around that long!

*You can use anywhere from no sugar to 3 cups of sugar depending on your personal preference and depending on the batch of fruit you're using. I always use at least one cup of sugar and then add more based on taste. Do not add more than 3 cups of sugar.
**9 quarts of fresh strawberries makes 3 batches of jam: 18 8oz. jars, 4 4oz. jars; 2 quarts makes approx. 5 cups of purée .

Thursday, July 15, 2010

Roasted Eggplant Lasagna

Found this recipe when we were blow-drying my mom's cookbooks after a leak in the kitchen. It's adapted from the Williams-Sonoma Pasta cookbook. I loved the addition of the goat cheese; it was delicious!


J'adore: Roasted Eggplant Lasagna

Ingredients:
1/2 a large eggplant, diced
2 zucchini, diced
1 red or orange bell pepper, diced
1 onion, diced
8-10 mini plum tomatoes OR 4 regular size tomatoes, diced
1 can fire roasted diced tomatoes with roasted garlic
4 cloves garlic, minced or pressed
olive oil
4 sprigs fresh rosemary, minced
1 lb. (med. container) tomato sauce*
1 package fresh lasagna sheets*
1 lb. (1 med. size container) fresh ricotta cheese*
1 small log (5 oz.) goat cheese
1/2 cup half and half, milk, or cream
leaves from 2-3 sprigs fresh parsley, chopped or minced
grated parmesan or romano cheese

Directions:
Dice the eggplant, zucchini, onion, bell pepper, and rosemary. Mix them together in an oven-safe baking dish, drizzle with olive oil, sea salt, and pepper, toss to coat, and bake at 450°F for approximately 35 mins. The vegetables should be cooked and lightly browned.

In a skillet or sauce pan combine diced tomatoes, fire roasted tomatoes, garlic, and some olive oil. Turn heat to med-low and simmer for approximately 15 minutes while the other vegetables are roasting.

In a separate bowl, combine ricotta, goat cheese, half and half, and chopped parsley.

To assemble the lasagna, first pour some tomato sauce into the bottom of your lasagna dish. Place a layer of pasta over the sauce. Spread 1/3 of the roasted vegetables onto the pasta and drizzle or spread 1/4 of the tomato mixture over it. Add another layer of pasta, another layer of veggies, and some more of the tomato mixture or sauce. This time, dot with the cheese blend before adding your next layer of pasta. Continue with one more layer containing cheese, tomatoes and/or tomato sauce, and roasted veggies. I usually sprinkle some grated parm. or romano cheese on each layer as well. Once you have your final layer of pasta over the cheese and veggies, top with the remaining tomato mixture and ample sauce to cover all of the pasta. Sprinkle with more grated cheese. Bake at 350°F for approximately 45 minutes.


*I am spoiled and always get fresh pasta sheets, fresh ricotta, and sauce from Carlino's Italian Market in West Chester or Ardmore. If you can get fresh, use it because it makes a far superior lasagna.

Saturday, July 10, 2010

Pickles

This year one of the other teachers at school gave me some cucumber seedlings. Insanely, I planted all 15 of them in my new (2nd) veggie bed. The cukes loved the township compost, and just this week I've picked over 25 cucumbers. I've never pickled anything before, but what else can you do with so many cucumbers?

Today I'm trying two different pickle recipes in the hopes that at least one, if not both, will be good. Of course, waiting will be the hardest part: at least 3-4 weeks just to taste test a jar!

The first recipe is from my neighbor's Whole Living July/August 2010 magazine. As usual, I made some modifications.

Sour Pickles
(makes 4 pints)

3.75 lbs. cucumbers (approx. 6 or 7, 3-4in. cukes)
1/3 cup pickling salt plus 1 tsp.
2 1/2 distilled white vinegar
2 1/2 cups water (I used filtered from the Brita)
pickling spice
8 cloves garlic, halved
8-16 sprigs fresh dill

Pickling Spice:
1 Tbsp. whole black peppercorns
1 Tbsp. yellow mustard seed
1 tsp. whole allspice
1/3 cinnamon stick, crumbled

The Night Before:
Trim down both ends of the cucumbers with a knife. Apparently, leaving the ends on create some funky results. I had to trim them down anyway to make the cucumbers fit in the pint-sized jars. Cut cucumbers into spears. Put spears in a large bowl, add 1/3 cup pickling salt, cover with cool water, and mix to dissolve salt. Put a small plate over the spears to keep them submerged, and stick the bowl in the fridge overnight (or 12 to 18 hours).

On the second day:
1. Prepare the pint-sized jars by washing them with warm, soapy water. Place them in a large canning pot or other large pot. Fill the pot with hot water making sure that all of the jars are level, rim-up, and covered by at least an inch of water. Cover the pot and bring to a boil. Jars will need to boil for at least 10-15 minutes. Leave them simmering in the pot as you prepare everything else.
2. Wash the bands and lids with warm soapy water. Put the lids in a small pot of water and bring them to a boil. Dry the bands and put them to the side.
3. Drain the cucumbers and rinse thoroughly.
4. Bring vinegar, water, and 1 tsp. pickling salt to a boil.
5. Lift jars out of the water one at a time making sure to empty all of the water back into the canning pot. Lay jar on its side on a kitchen towel. Add two garlic halves to the bottom and fill jar half-way with spears. Place 2-3 sprigs of dill in the center, and continue filling the rest of the jar with spears. Turn upright, add two more garlic halves and one tsp. (plus a little) pickling spice. Fill with boiling pickling liquid leaving 1/2-inch head space.
6. Slide a non-metal spatula or chopstick into the jar between spears to release any extra air bubbles. Lightly tapping the jar on the towel is another way to release some of the extra bubbles.
7. Make sure the the rim and threads of the jar are clean. Place dome lid on top of jar and screw the band down .
8. Repeat with the rest of the jars.
9. Once all of the jars are filled, gently place them back into the canning pot. Make sure that the jars are covered by at least 2 inches of water.
10. Boil steadily for 10 minutes.
11. Carefully remove jars and place on a clean kitchen towel out of the way somewhere. Cover lightly with a lightweight cloth, and listen for pops over the next few hours.
12. Store in a cool, dark place.


Side notes:
1. In crawling the internet for pickling recipes, almost ALL of the comments mentioned to only use pickling salt because other salts make pickles cloudy and dark.
2. The original recipe calls for three times the amount of spices to make the pickling spice. I found that 1/3 of the amount (which is the amount I've listed above) was more than enough.
3. Any time you do canning you have to use new dome lids. You can re-use the jars and bands, but the dome lids will only make a seal once. (If you buy new jars, those dome lids are good.)
4. I always process an extra jar or two, just in case. Depending on the size of your cukes or how loosely you pack them, you may end up with 5 or 6 jars.
5. DON'T press on the lids to check to see if they've popped! If you pop the lid yourself, you'll have to re-process with a new lid. Wait 12-18 hours before checking the lids to make sure they've sealed. Generally, you can look at the tops to see if the dome is concave. If you can't tell, and you haven't been around to hear the popping, then you can gently press in the center of the lid. If it's already down, you're in good shape. If it's not, you'll need to process the jar again with a new lid.


The second recipe I found at allrecipes.com. Here's the link to the original recipe. The comments other people made were pretty helpful. Again, hopefully these pickles will taste good in two months!!

Dill Pickles
(makes 10 pints)

8 lbs. cucumbers*
4 cups white vinegar
12 cups water
1/2 cup pickling salt
16 cloves of garlic, peeled and halved
8-16 sprigs and flower heads fresh dill
mustard seed, dill seed, hot pepper flakes (optional)*


1. Wash and cut cucumbers as in the first recipe. Place spears in dish of ice water (or in the kitchen sink, filled with ice and cold water) and let sit for two hours, replenishing the ice often.
2. Sterilize jars and lids as in first recipe.*
3. Bring water, salt, and vinegar to a boil in a large pot.
4. Add 2 half-cloves of garlic to the bottom of each jar, fill with cucumbers, add fresh sprigs of dill, and another 2 half-cloves of garlic.
5. Process jars as in the first recipe.


*After the first batch (top recipe), I only had 5 lbs. of cucumbers left. I'm pretty sure that having enough jars and enough brine is what's key. Having a few more or less cukes shouldn't be a problem.
*The original recipe calls for 8 quart-sized jars. I needed 10 pint-sized jars for my 5lbs. of cukes.
*The original recipe may mean that you are supposed to ice the cukes whole, then cut them. I iced the spears. Right away I noticed that the spears from the second recipe are much firmer than the ones from the first recipe. You wouldn't think that a few degrees or a few hours would make that drastic a difference, but it did.
*A number of people on all recipes made comments about adding dill seeds, mustard seed, or hot pepper flakes to their pickles. As I was in an experimental mood, I tried 2 jars with scant 1/4 tsp. each dill seed and mustard seed, and 2 with scant 1/4 tsp. each rep pepper flakes and mustard seed (in addition to the dill and garlic). The rest I made plain with lots of dill and 2 cloves of garlic.

Thursday, November 26, 2009

Peanut Butter Cup Cookies


These cookies are the best peanut butter cookies I've ever had. Whereas so many other peanut butter cookies tend to be dry, these are moist and delectable. I tend to make these to take to parties, and normally it's all I can do to keep my husband from eating all of them before we get to our destination. I think the original recipe is from a Hershey's cookbook, but I'm not certain. You're supposed to make a huge roll of dough and make can-sized cookies, but I just make regular-sized cookies and skip the log step. I use Skippy... not sure how they would turn out with natural peanut butter. Makes about 30 cookies.

J'adore: Peanut Butter Cup Cookies

Ingredients:
3/4 cup chunky peanut butter
1/2 cup (1 stick) butter, softened
1 cup packed light brown sugar
1/2 tsp. baking powder
1/2 tsp. baking soda
1 egg
1 1/2 tsp. vanilla
1 1/4 cups flour
2 cups quartered mini peanut butter cups

Directions:
Cream peanut butter and butter with a mixer or in a food processor. Add sugar, baking powder, and baking soda, and blend again. Add egg and vanilla, and blend again. Blend in flour slowly until just mixed. Stir in peanut butter cups, cover, and refrigerate for approx. 1 hour.

Form cookies into patties of desired size, and place on cookie sheets. Bake at 375 for 10 minutes or until lightly browned. The trick with these cookies is not to cook them for a minute too long! They have to be just starting to lightly brown to be prefect. Allow to cool for a few minutes on the trays before transferring to a cookie rack.

Wednesday, November 25, 2009

Thanksgiving Staple and Side

Mollie Katzen's Spinach Ricotta Cheese Pie has been a favorite in my family for as long as I can remember. I always requested it for my birthday, my cousin always requested it for Thanksgiving and Christmas, my husband drops not-so-subtle hints every time it's been a while since I've made it, even a co-worker's mother demanded the recipe for days on end until I finally wrote it down for her. In short, it's one of the best savory pies I've ever had, and it has become a Thanksgiving tradition in our family. The recipe is from the original Moosewood Cookbook but was sadly omitted from the new edition. As usual, changes have been made over time. I'm also including a recipe for a side that I LOVE. The original recipe comes from a story I heard on NPR last year.

Je ne peux pas vivre sans: Spinach Ricotta Cheese Pie

Ingredients:
1 pie shell (I use a store-bought deep-dish shell to save on time. Feel free to make your own!)

1.5 packages of chopped frozen spinach
1 small onion
1 pint ricotta cheese
1/2 cup grated cheddar cheese
2 eggs
1/2 tsp. salt
fresh, frozen, or dried basil (fresh is always best)

sour cream

Directions:
Steam spinach and drain thoroughly. Be sure to press out all excess water or you'll have a watery pie. Dice onion and saute in olive oil. Combine spinach, onion, ricotta, eggs, salt, cheddar, and basil in a mixing bowl. If you're afraid that the spinach is still too watery you can add a tablespoon of flour. Spread mixture evenly in pie shell. Spread sour cream over the top of the spinach mixture. You can use as much or as little sour cream as you want. I prefer to use a lot and spread it to the edges-- it's my favorite part of the pie. Bake at 350 for 45 minutes.


J'adore: Wild Rice Stuffing

Ingredients:
2 cups vegetable broth
1 cup wild rice*
1/4 cup dried cranberries (or other dried berry)
1/2 cup walnuts
salt and pepper to taste

Directions:
In a pot, bring the vegetable broth to a boil and add the rice. Cover, and reduce heat to low. Simmer until all liquid is absorbed and rice is tender (about 30 mins). Add cranberries, walnuts, salt and pepper to taste, and serve. Can be served inside a cooked acorn squash.

*I use half wild rice, half Brown Rice Medley from Trader Joe's, which has brown rice, black barley, and daikon radish seeds.

Monday, September 28, 2009

Potatoes All Rotten (Potatoes au Gratin)

I have no idea why, but for whatever reason we've always called potatoes au gratin "potatoes all rotten." It makes them sound less than appealing but a lot less snooty! They're a favorite of my potato-head hubby. I probably make them different every time, but here's the gist of the recipe.

J'adore: Potatoes all Rotten (aka Potatoes au Gratin)

Ingredients:
Potatoes (maybe 6-10 medium-sized potatoes; I like to use red bliss)
1.5 Tbs margarine/butter (I use a combination of the two)
1 Tbs flour
1 cup half & half, cream, or milk (works best with at least some cream content... i.e. I wouldn't make it with skim)
1.5 cups shredded sharp cheddar cheese
salt to taste

Directions:
Peel and slice the potatoes. Place all potato slices into a pot and cover with cold water. Add a little salt to the water, and bring to a boil. Cook potatoes approx. 10-15 minutes or until potatoes are slightly tender.

In the mean time, add margarine/butter to a small sauce pan. Melt on low heat. When butter/margarine is melted, add flour and stir continually to make roux. When roux has started to thicken, add cream/half & half/milk (I use a combination of half & half and 1% milk), and continue stirring. Continue to heat on low, stirring constantly. Add shredded cheese a little at a time, and continue stirring. If mixture gets too thick, add a little milk to thin it. Add a little salt if desired. The consistency should be both a little thick and a little runny.

Drain off the potatoes and place in an oven-safe dish. Pour roux over potatoes. Nudge the potatoes around a little so that the roux coats all of the potatoes evenly. Place a lid on the dish and bake at 350°F for approximately 35 minutes.

Potato Leek Soup

Leeks are probably one of my favorite vegetables. This year I tried growing them in my vegetable garden and was thrilled with my success. The only thing is when you have a hundred of them (and they don't keep well) you have to think of good ways to use a bunch of them up in one recipe. Potato leek soup fits the bill. The trick is to save some of the potato chunks to add in after pureeing.

J'adore: Potato Leek Soup

Ingredients:
1 small onion, chopped
1 clove of garlic, pressed or minced
3 leeks, white and light green parts chopped
3 cups potatoes, chopped (I used 1 baking potato, 3 small red potatoes, and 2 Yukon gold potatoes)
2 quarts vegetable broth
olive oil (no more than 1 tsp.)
thyme
salt and pepper to taste

Directions:
Saute garlic, onion, leeks, and potatoes in olive oil in a large pot. When onions and leeks look transparent add vegetable broth and some salt and bring to a boil. Reduce to a simmer, and allow to cook until potatoes are tender. Add fresh or dried thyme to taste (I think I used around 6 sprigs from the garden.) Once potatoes are tender, turn the heat off and ladle half of the soup into a blender. Puree. With a slotted spoon scoop some of the remaining potatoes and leeks out of the pot and set aside. Blend the remaining broth and return all pureed soup as well as potato and leek chunks to the pot. (You may have to do some finagling here; I poured the first batch from the blender into a storage container until I had finished blending the rest of the soup from the pot.) Turn heat back on and add salt and pepper to taste.

*Cream, half & half, or milk can be added for a creamier consistency. I intended to add half & half but didn't find that the soup actually needed it.

Vegetable Barley Soup

A little over a year ago I had one of the most amazing soups I've ever tasted. It was vegetable barley soup. I couldn't get enough of it. Sadly, when I asked for the recipe I was informed that it was much too complicated to pare down for a family-sized portion. Sadder still, the restaurant was in our hotel in the Swiss Alps. Since then I have been searching high and low for a vegetable barley soup recipe. I've looked through all of my recipe books, searched epicurious and vegetariantimes.com, crawled the interwebs at large, and still haven't been able to find something that resembled that amazing soup. I finally decided to give it a shot on my own. It's not the same; not even comparable, really, but it's husband approved and pretty tasty. (I do have to admit that I drew ideas from The Papaya Chronicles and The Vegetarian Table: France)

J'aime: Vegetable Barley Soup

Ingredients:
1/2 cup pearled barley
1 small onion, chopped
1 or 2 leeks, white and light green parts chopped
1 medium potato, chopped
3 carrots, chopped
4 or 5 celery stalks, chopped
2 cloves garlic, pressed or minced
2 quarts vegetable broth
approx. 2 tsp. white balsamic vinegar
salt and pepper to taste
olive oil

Directions:
Pour the barley into a medium-sized sauce pot. Turn the burner on low, and lightly toast the barley stirring constantly. When barley starts to smell toasted (approx. 3-5 mins.) remove from burner and transfer into a strainer. Rinse barley under water to remove any unwanted soil or dust particles. Return to pot and add 2 cups of water. Add a dash of salt, bring to a boil, and then reduce heat to simmer for approx. 30-40 minutes.

Dice onion, leeks, carrots, celery, and potato and add to a large pot. Add minced/pressed garlic and a dash of olive oil. Turn heat to low and saute vegetables until onions and leeks are translucent. Add vegetable broth, bring to a boil, and then reduce heat to simmer.

Once barley appears fluffy and cooked, drain if necessary, and add to the soup. Continue to allow soup to simmer. Add a dash or two of white balsamic vinegar as well as salt and pepper to taste.

Wednesday, July 29, 2009

Simply the Best Bruschetta I've Ever Had

This recipe comes from my local farmer's market. Each week the market provides recipes that feature something for sale and in season that week. Once I sampled the bruschetta, I was addicted. It's very easy to make, just a little time consuming with all of the chopping. I tend to like my chunks pretty small, so it may take less time if you prefer larger pieces of tomato, mozzarella, etc. One thing I have noticed, though, is that a lot of the flavor depends on the variety of garlic used. We get our garlic from the market, our CSA, or from Trader Joe's, and it tends to be good and flavorful. Last summer I bought some garlic at the super market at the shore and the bruschetta wasn't nearly as good. For this recipe both the marinated mozzarella and the jarred sun dried tomatoes come from Trader Joe's. I'm sure that you could just as easily use dry sun dried tomatoes, but I prefer to use these. For more recipes, and to view this original recipe, check out the Glenside Farmer's Market's web page.

J'adore: Sun dried Tomato Mozzarella Bruschetta

Ingredients:
2 cloves garlic, minced
1 medium tomato, finely diced
1 pint grape tomatoes, diced
1/2 cup sun dried tomatoes, thinly sliced and diced
1/2 container (approx. 8oz.) marinated mozzarella balls, finely diced

Directions:
Chop and dice all ingredients accordingly. Combine all ingredients and add sea salt to taste. Serve on toasted French bread.

Tuesday, July 21, 2009

Zucchini Bread Variations

If life gives you lemons, make lemonade. If life gives you zucchini, make zucchini bread. I've heard stories about towns where people sneak zucchini into each others' mailboxes, leave them on car seats, and pretty much have all out zucchini warfare. A student of mine has told me (on more than one occasion) that he can no longer stomach zucchini after his mother planted it in the garden one summer. I laughed at all of these stories, because I love zucchini, and, honestly, how bad could one little plant be? I suppose I learned my lesson when one weekend I had little zucchini and the next I had green clubs.

Our old neighbor, Sarah, once made us some zucchini bread, and I loved it. Luckily she gave us the recipe before she moved. The more I talked about zucchini and zucchini bread, the more people kept telling me about the different recipes they had. Who knew there could be so many variations? The best thing about zucchini bread, aside from its delicious flavor, is that it freezes well. In the summer I like it plain, but in the winter I like it slightly toasted with a little cream cheese. In any case, here are a few of the recipes I've tried:

J'aime: Vermont Summer Muffins

This recipe is originally from one of the Moosewood cookbooks. Although they're called muffins, they're really more like muffin-shaped biscuits. Scott has been eating these right out of the fridge and prefers them to the sweeter zucchini breads. I like mine warmed up in the toaster oven with a little butter. Makes about 20 muffins.

Ingredients:
3 cups unbleached white flour
4 tsp. baking powder
1/2 tsp. baking soda
1 1/2 tsp. salt

1 cup grated sharp cheddar cheese
1 cup grated zucchini
3 Tbs. chopped fresh parsley
2-3 Tbs. chopped scallions
1 Tbs. chopped fresh dill

2 eggs
1 cup buttermilk
1/4 cup melted butter

Directions:
1. Preheat oven to 350°F.
2. Sift all dry ingredients into a large mixing bowl.
3. Add cheese, zucchini, scallions, and herbs, and toss lightly to mix.
4. In another bowl, beat the eggs and then whisk in the buttermilk and melted butter.
5. Add the wet ingredients to the large bowl and stir enough to blend.
6. Spoon batter into buttered muffin tins, filling about 3/4 full.
7. Bake for 30-35 mins. or until golden.


J'adore: Laura's Zucchini Bread with Chocolate Chips and Pecans

This recipe came to me thanks to Facebook. An old friend from high school sent me her favorite recipe when she saw that I was making zucchini bread. The original recipe is from An Endless Harvest. Laura suggested adding chocolate chips to the batter. The recipe calls for pecans, but Scott is not a big fan of nuts in breads or cookies, so I made two mini loaves with plain batter and three with chocolate chips and pecan pieces. This has been my favorite recipe so far, and I like that you can sub apple sauce for the oil. Makes 5 mini loaves.

Ingredients:
3 cups flour
1 3/4 cups sugar
1 tsp. baking soda
1 tsp. cinnamon
1/2 tsp. baking powder
1 tsp. salt

3 eggs
1 cup vegetable oil (or 1/2 cup oil and 1/2 cup apple sauce)
2 tsp. vanilla
2 tsp. grated lemon peel
2 tsp. lemon juice
3 cups grated zucchini (with skin)

1 cup chopped pecans or walnuts (optional)
1/2 cup chocolate chips (optional)

Directions:
1. Grease and flour 5 mini loaf pans or two regular sized loaf pans.
2. Sift all dry ingredients together into a large mixing bowl.
3. In a smaller bowl beat eggs slightly. Add oil (or apple sauce and oil), vanilla, lemon peel, and lemon juice. Beat briefly.
4. Add wet ingredients to dry and stir.
5. Add zucchini and stir to blend evenly.
6. Add pecans and chocolate chips, if desired.
7. Batter will be thick and should be spooned into loaf pans. Fill pans approx. 3/4 full.
8. Bake at 325°F for approx. 45 mins. to 1 hr. depending on the size of the loaf pans. Bread should be golden on the top, and a knife should come out clean when inserted into the bread.

Jodi's Lemon or Lime Cheesecake

Several years ago a co-worker's wife gave me this recipe. I wish I had a scanner at home, because the recipe is written out very beautifully and artistically (which makes perfect sense since Jodi is a very talented block print artist). I've been meaning to make this for a while, but I just never seem to have a reason to make an entire cheesecake. Now that I've finally gotten around to making it I'm not quite sure why I waited so long. It's a delicious, albeit a bit laborious, result.

Note: If you are looking for a low-calorie cheesecake, this is NOT it.

J'adore: Jodi's Lemon/Lime Cheesecake

Ingredients:

Crust:
2 sleeves cinnamon graham crackers
3/4 stick melted butter

Filling:
3 8oz. pkgs. cream cheese, softened
1 1/3 cups sugar
3 eggs, room temp.
1/4 cup fresh lemon or lime juice
1 Tbs. lemon or lime zest
2 tsp. vanilla

Topping:
2 cups sour cream
3 Tbs. sugar
1 tsp. vanilla

Glaze:
3/4 cup water
1/3 cup lemon or lime juice
1/2 cup sugar
1 egg yolk
1 1/2 Tbs. corn starch
1/4 tsp. salt

1 Tbs. butter
2 tsp. lemon or lime zest


Directions:
1. Preheat oven to 350°F.
2. For the crust: blend graham crackers and butter together. Press mixture into the bottom of a spring form pan. Bake for five minutes.
3. For the filling: gradually blend sugar into cream cheese. Beat the eggs in one at a time. Mix in lemon/lime juice, zest, and vanilla. Pour mixture onto crust. Bake for approx. 40 minutes until lightly puffed and slightly brown. Remove from oven and let cool 10-15 minutes.
4. For the topping: mix all ingredients together. Pour/spread topping over cooled cake. Bake for 15 minutes. Remove from oven and let cool 1 hour.
5. For the glaze: in a small saucepan slowly heat all glaze ingredients except butter and zest, stirring constantly until thick (approx. 20 mins.) Once thick, remove from heat and mix in butter and zest. Allow to cool.
6. When both cake and glaze are cool, spread glaze over cake. Refrigerate at least 2 hours.

Wednesday, July 8, 2009

Vegetable Fajitas

I'm not sure if my mom came up with this recipe or if I did, but I think I've been making it for as long as I've been cooking. The measurements aren't too precise, but it's a wonderful summer recipe, especially with the bounty of home gardens and farmers' markets.

J'adore: Vegetable Fajitas with Caramelized Onions

Ingredients:
1 zucchini
1 yellow summer squash
2 carrots
1 bell pepper (red, yellow, or orange)
olive oil (or Persian Lime Infused Olive Oil)
balsamic vinegar or white balsamic vinegar
approx. 1/2 jar salsa
chili powder
juice from 1 large lime slice (optional)

1 or 2 onions, sliced or diced
1/2 tsp. olive oil
1/4 to 1/2 tsp. brown sugar

tortillas
grated cheddar cheese (optional)
sour cream (optional)

For the fajita filling:
1. Dice all vegetables and put into a large non-stick skillet. Add approx. 1 Tbs. of olive oil or lime olive oil, stir to coat vegetables, and turn heat on to medium-low.
2. Cook vegetables for about 5 minutes, then add approx. 1 Tbs. balsamic or white balsamic vinegar to the skillet. Add approx. 1/2 a jar of prepared salsa to the skillet. Stir to combine ingredients. Add chili powder to taste. Cook vegetables long enough that they are soft, but still a little crunchy. Remove from heat.

For the caramelized onions::
Slice or dice onions according to your preference. I prefer to half my onions and then slice them; Scott prefers them diced so that they're not too stringy and are easier to eat. Place onions in small non-stick frying pan with oil. Saute until tender. Sprinkle in brown sugar, stir, and continue to saute another minute or two.

Serving suggestions:
Heat tortillas for a few seconds in the microwave to soften. Layer grated cheese, caramelized onions, fajita vegetables, and sour cream onto tortilla. Fold and serve with tortilla chips, salsa, and guacamole.